


Comment profiter d'un meilleur son avec mon récepteur AV Pioneer intégré au tableau de bord


Si vous lisez ceci, vous êtes probablement l'heureux propriétaire de produits Pioneer, vous travaillez dans l'industrie automobile, ou vous êtes un passionné cherchant la meilleure façon d'optimiser votre système audio automobile... Ou mieux encore, vous cochez toutes ces cases !
Comme cet article est le quatrième d'une série, nous vous encourageons vivement à consulter nos articles précédents si vous n'avez pas encore eu l'occasion de les lire. Nous abordons une variété de sujets, notamment les technologies de certains récepteurs AV Pioneer pour voiture, comment optimiser votre musique depuis Apple Music sur iPhone, et comment améliorer vos réglages audio pour les sources audio compressées comme Spotify.
Comme vous pouvez le voir, ces articles précédents ont principalement couvert les technologies en coulisses, ou l'optimisation des sources audio externes connectées à nos récepteurs AV Pioneer embarqués via un smartphone et des applications populaires sur le marché. Comme nous avons pris soin de couvrir ces sources audio, il était logique et essentiel pour nous de traiter les différentes fonctionnalités de traitement audio internes spécifiques aux produits Pioneer. Après tout, le son fait partie de notre ADN et de notre histoire !
Avant d'entrer dans le vif du sujet, il est important de comprendre le contexte dans lequel nous nous trouvons. L'habitacle de votre véhicule est complètement différent de ce que l'on peut avoir à la maison dans notre salle d'écoute, ou encore plus, si l'on compare l'audio automobile à l'écoute via vos écouteurs préférés. Par leur concept, écouter de la musique avec des écouteurs est le chemin le plus court et implique très peu d'intermédiaires, et tout aussi important, est le moins impacté par son environnement ; vos enceintes (vos écouteurs dans ce cas) n'ont pas à négocier avec votre environnement immédiat, elles sont directement sur vos oreilles et donc aucune, ou presque aucune, altération acoustique n'est présente. Pour votre véhicule, c'est une toute autre histoire ! Vous devez négocier avec plusieurs éléments ; bruits environnants, bruits de roulement, mais encore plus avec les différentes positions des enceintes ainsi que les formes et textures des matériaux qui vont grandement altérer la réponse acoustique de votre système audio automobile. Ainsi, tout comme beaucoup aiment ajuster la réponse caractéristique de leurs systèmes audio, des plus petits écouteurs aux grands systèmes audio domestiques, le monde automobile ne fait pas exception, et il est ESSENTIEL d'avoir une bonne réglage acoustique pour votre véhicule pour corriger ces altérations inhérentes à l'environnement si vous voulez pleinement profiter de grands moments musicaux dans votre voiture !
Quel que soit le système audio de la voiture, vous devez toujours garder à l'esprit que la performance et la qualité musicale ne seront aussi bonnes que le maillon le plus faible de la chaîne. Il est donc essentiel d'assurer un équilibre dans la qualité des composants, de la source jusqu'à vos oreilles. Votre source audio (la source de votre musique), le support de stockage ou de streaming, votre unité de traitement et de conversion audio (votre récepteur AV Pioneer dans ce cas), les amplifications éventuelles, et vos haut-parleurs. Bien sûr, les accessoires d'installation, notamment votre le câblage ainsi qu'un minimum de matériaux acoustiques doivent également être prévus et combinés avec une installation, réalisée selon les règles de l'art. Peu importe si vous choisissez un bon produit, s'il n'est pas correctement installé, il ne pourra jamais délivrer ses meilleures performances.

Donc, vous avez fait vos devoirs et soigneusement sélectionné les bons composants pour l'installation de votre système audio de voiture. Maintenant que vous avez ces composants en main, et parmi eux, vous avez bien sûr l'un de nos appareils AV Pioneer pour voiture, il est temps de le configurer correctement pour obtenir un meilleur son dans votre voiture.
Pour cet exercice, vous devrez avoir vos sources musicales préférées à portée de main, voire quelques outils supplémentaires si vous souhaitez affiner davantage le processus, ce que vous verrez plus tard dans cet article.
Points importants à savoir avant de continuer
Avant de naviguer dans les menus de votre appareil, il est important de noter les points suivants pour mieux comprendre le fonctionnement de votre récepteur AV Pioneer intégré.
- Le véhicule doit être à l'arrêt et le frein à main engagé pour accéder aux menus des réglages de votre appareil.
- La section de réglage audio ne sera pas accessible si votre source AV est réglée sur "OFF" ou si vous utilisez une source smartphone telle qu'Apple CarPlay ou Android Audio. Notez cependant que vos réglages audio seront appliqués à toutes vos sources audio, y compris Apple CarPlay et Android Auto.
Puisque la qualité de la source audio est importante lors des réglages audio, vous devez la sélectionner avec soin. Ici, nous insistons sur "SÉLECTIONNER AVEC SOIN" et non nécessairement choisir la meilleure qualité de source, mais plutôt une source audio représentative de ce que vous écouterez au quotidien. Ainsi, si vous écoutez habituellement de la musique à partir de sources audio non compressées, vous DEVEZ utiliser ce même type de source pour l'étalonnage acoustique de votre véhicule. Si vous écoutez des sources audio compressées, par exemple Spotify Premium, alors vous devez utiliser une source audio à 320 kbps pour effectuer votre calibration.
Ce que nous avons constaté, c’est que les gens ont tendance à utiliser une source audio de référence non compressée pour un client qui écoute principalement de la musique compressée. Malheureusement, faire cela pour un véhicule dont le propriétaire écoute principalement de la musique compressée donnera au client un résultat très simple, une grande déception ! Non pas parce que le travail n’a pas été bien fait, mais parce que la référence pour l’exercice n’est pas la bonne. Puisque l’audio compressé a des caractéristiques différentes pour le rendu acoustique ; réduction prononcée des hautes fréquences (notes principales et harmoniques), et dynamique différente dans les basses fréquences, si nous ajustons la réponse en fréquence avec une source audio qui ne possède pas ces caractéristiques, et donc avec une source ayant des aigus plus prononcés, ces fréquences seront nécessairement atténuées lors de la calibration de manière trop importante pour écouter une source audio compressée. Le « manque » résultant de cette petite erreur présentera donc une signature musicale avec moins de détails, moins de brillance et moins de clarté. Votre musique sera plus « étouffée » avec des voix plus en retrait, et vous perdrez donc toute la vivacité de la musique.
IMPORTANT
Le dernier point important à considérer avant de commencer vos réglages est de ne pas augmenter votre volume d’écoute avant d’avoir lu cet article en entierVous verrez que nous couvrons tous les réglages audio de nos récepteurs AV embarqués dans l’ordre où ils apparaissent à l’écran et non dans l’ordre dans lequel vous devriez nécessairement effectuer vos réglages initiaux sur l’appareil. Par conséquent, ne montez pas le volume de l’appareil avant d’avoir effectué certains réglages clés, tels que les filtres de coupure du système audio. Cela pourrait endommager vos haut-parleurs, en particulier vos tweeters si vous êtes en mode « Réseau » mode.
ALORS COMMENÇONS !
Mode Réseau vs Mode Standard
Votre toute première configuration audio pour votre récepteur AV Pioneer embarqué ! Cette configuration est disponible dès la première mise sous tension de votre récepteur, ou après une réinitialisation d’usine. Veuillez noter que cette configuration n’est disponible que pour certains récepteurs Pioneer embarqués avec trois paires de sorties préamplifiées. Elle vous permet de choisir deux modes de fonctionnement audio et de déterminer comment les sorties audio de votre appareil seront utilisées.
En mode « STD » (Standard), l’appareil proposera des sorties audio avec les assignations suivantes ;
- caissons de basses (passe-bas),
- arrière (plage complète ou passe-haut),
- avant (plage complète ou passe-haut).
En mode « NWK » (Réseau), l’appareil proposera des sorties audio avec les assignations suivantes ;
- Les caissons de basses seront assignés au mode « Low » (passe-bas),
- Les sorties arrière seront basculées en mode « Mid » pour offrir la possibilité de couper ou non les fréquences hautes et basses indépendamment les unes des autres,
- et les sorties avant seront basculées en mode « High » pour se concentrer uniquement sur vos hautes fréquences.
Ces deux modes offrent des avantages et des inconvénients, mais permettent d’adopter deux approches très utiles selon vos objectifs lors de la conception de votre système audio. C’est à vous de choisir le mode qui correspond le mieux à vos besoins !
Accéder à vos réglages audio
- Le véhicule doit être à l’arrêt et le frein à main doit être engagé pour accéder aux menus de réglages du récepteur AV embarqué.
- Votre section de réglage audio ne sera pas accessible si ;
-
- votre source AV est réglée sur « OFF »,
- ou si vous utilisez une source smartphone telle qu’Apple CarPlay ou Android Audio. Notez cependant que vos réglages audio seront appliqués à toutes vos sources audio, y compris Apple CarPlay et Android Auto.
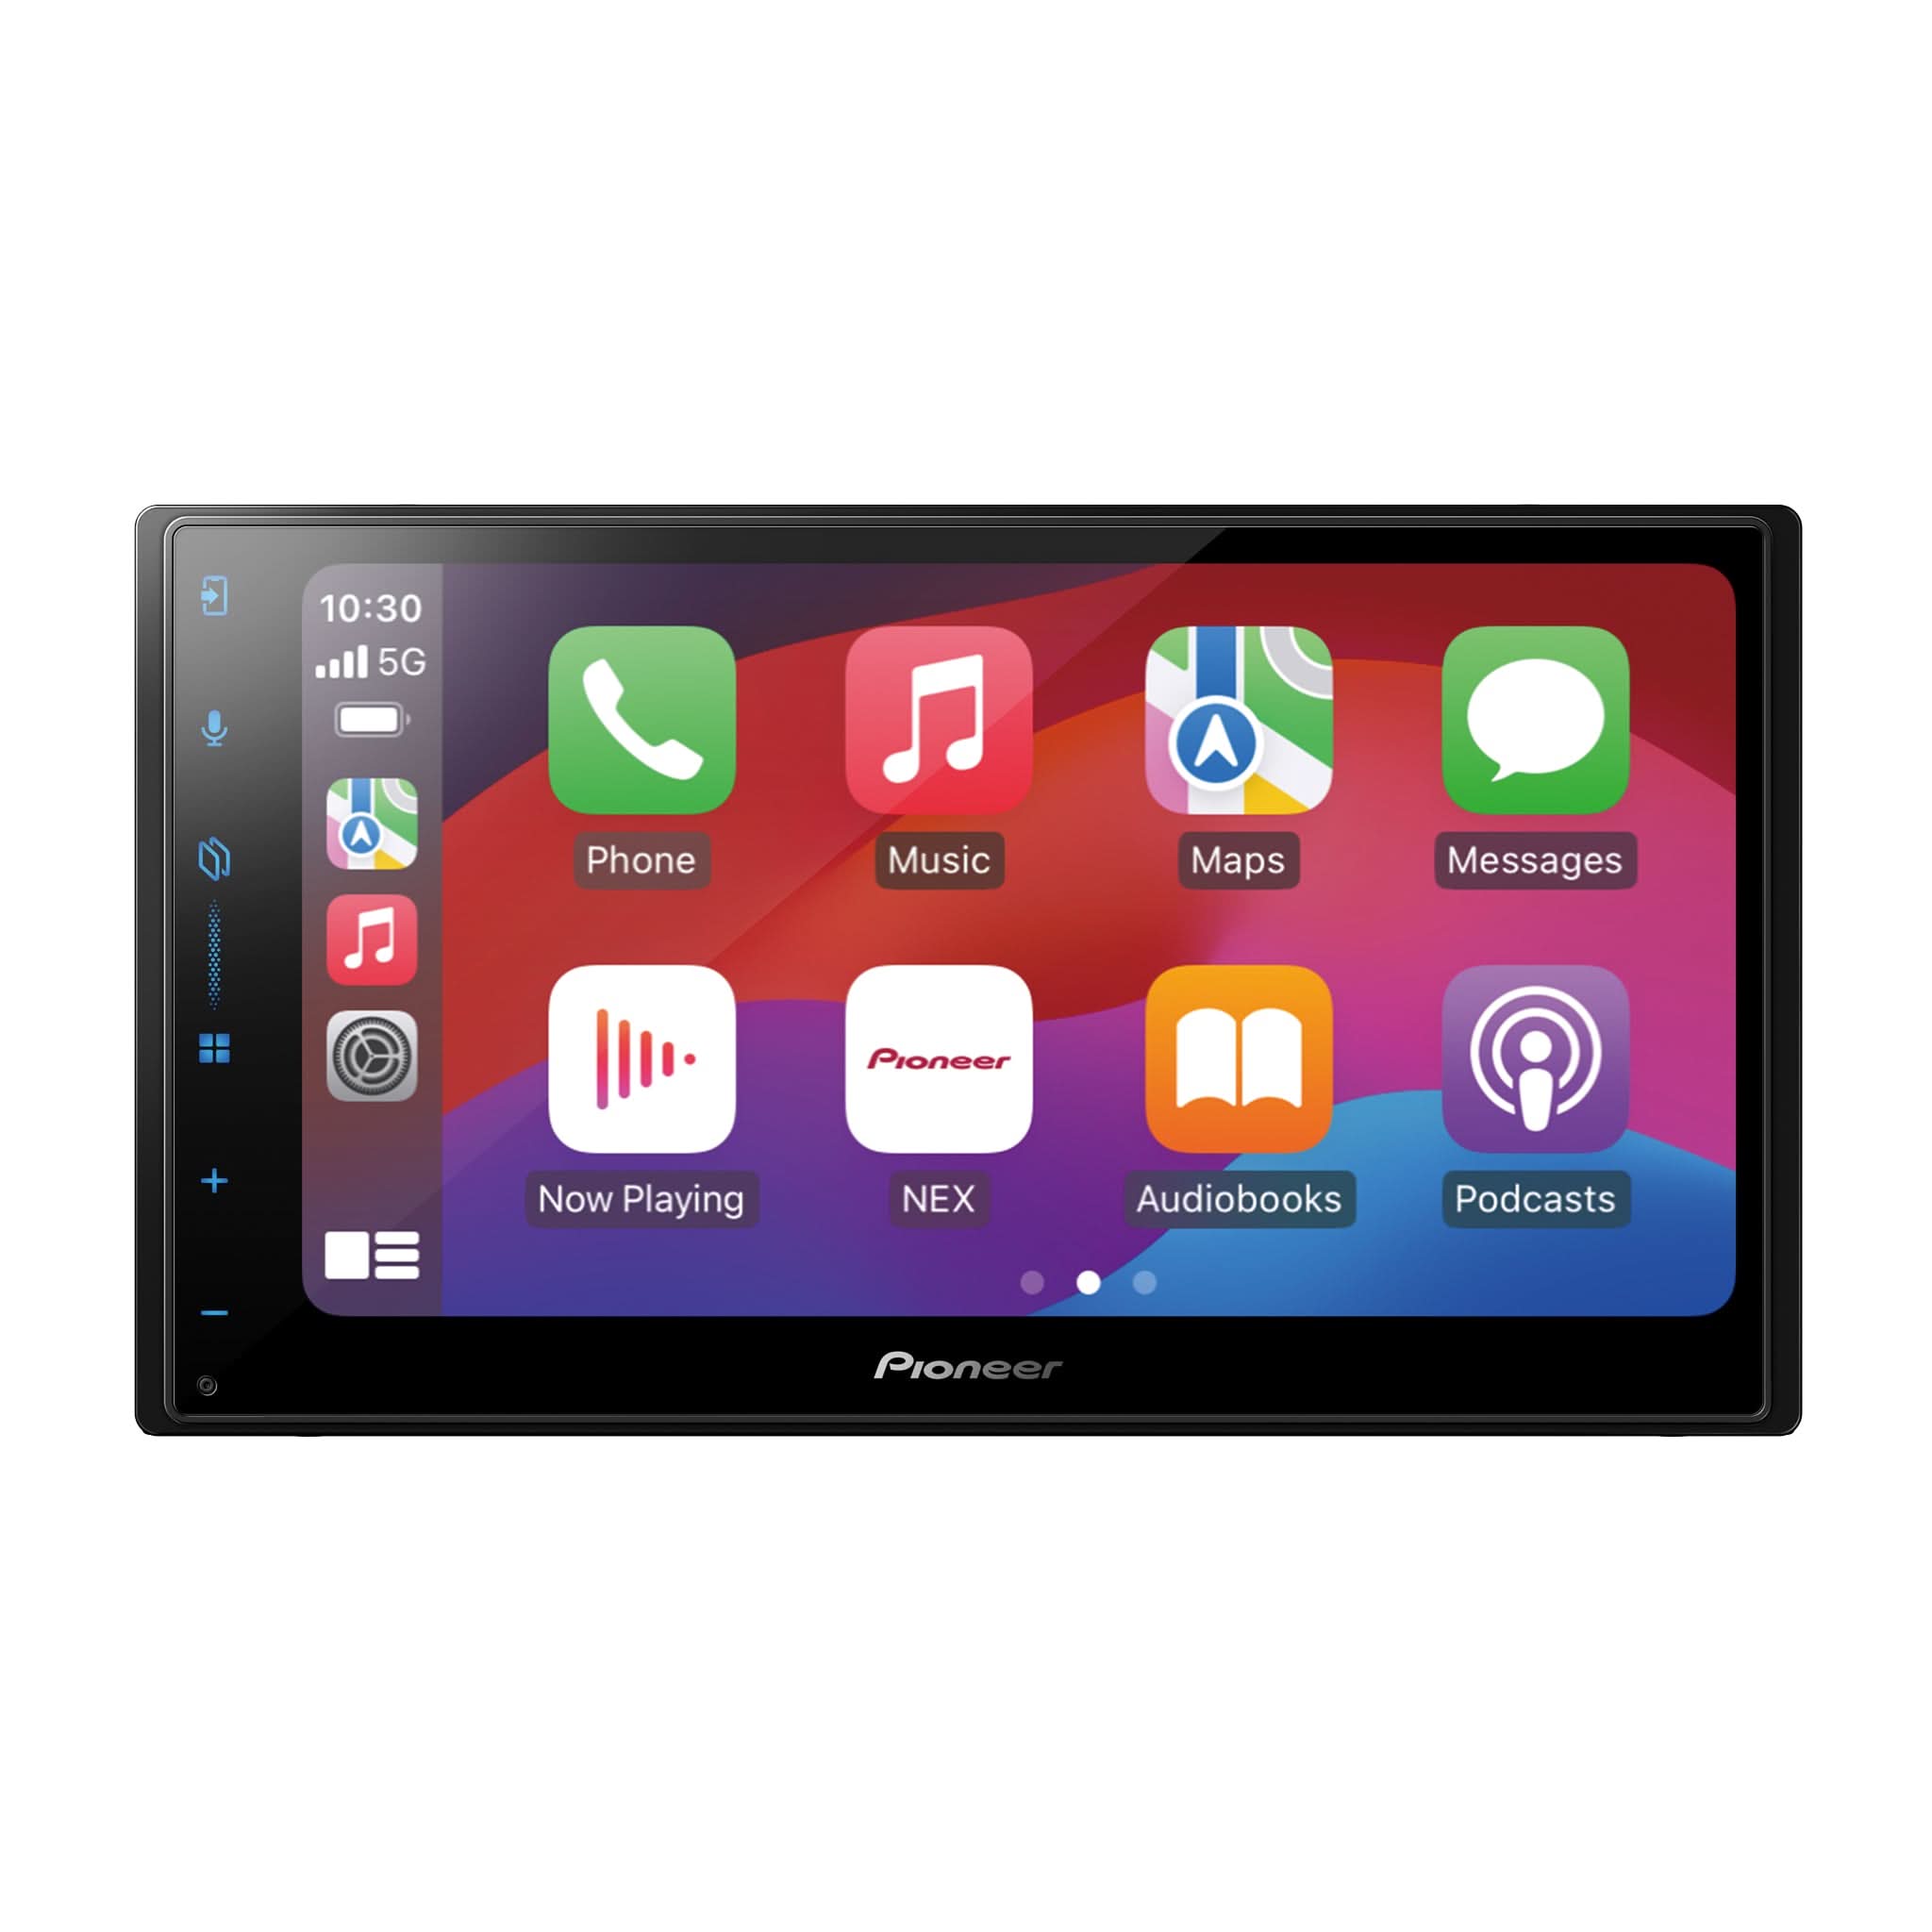
- Appuyez sur le bouton « Réglages », identifié par l’icône d’engrenage.
- Une fois dans le menu Réglages, sélectionnez l’icône du haut-parleur parmi les boutons à gauche de l’écran.
- Si vous avez suivi ces étapes dans l’ordre, vous aurez accès aux différents réglages audio.
-
- Si certains éléments du menu sont inaccessibles (grisées), cela signifie que le frein à main n’est pas activé ou que la source correcte n’est pas sélectionnée.

Réglages sonores de base (Fader / Balance / Loudness)
Une fois dans le menu des réglages audio, sélectionnez la ligne « Fader / Balance ».
La page de réglage « Fader / Balance » vous permet d’ajuster, comme son nom l’indique, l’équilibre entre les quatre sorties audio principales du récepteur embarqué. Gauche vs. Droite et Avant vs. Arrière. Les réglages se font à l’aide des boutons tactiles de chaque côté de la grille ou en glissant le curseur sur la grille pour des réglages rapides.
Veuillez noter que la fonction Fader ne sera pas disponible si vous êtes en mode « NWK » (Réseau).
Une fois revenu au menu des réglages audio, sélectionnez la ligne « Loudness ». Une petite fenêtre contextuelle apparaîtra, vous permettant de choisir l'une des quatre options selon vos besoins.
Loudness L'égalisation effectue une compression de la plage dynamique pour ajuster les niveaux entre les parties les plus fortes et les plus faibles de votre musique en fonction du volume d'écoute. Cela vous permet de mieux percevoir les basses fréquences à faible volume sans qu'elles deviennent trop fortes lorsque votre système audio est à un volume plus élevé. Selon votre source musicale, le volume d'écoute et les composants audio de votre système, son impact peut varier considérablement. Dans certaines situations, le désactiver sera préférable, tandis que dans d'autres, son utilisation sera appréciée. Cependant, soyez prudent, car selon vos sources et d'autres réglages, comme l'ajout de loudness au renforcement des basses et/ou d'autres augmentations supplémentaires dans la section des basses des réglages de l'égaliseur, cela aura un effet négatif, réduira la dynamique musicale et pourra même générer un son distordu. Utilisez-le donc avec précaution !

Réglages du niveau de volume (Régulateur Automatique de Niveau Sonore / Régleur de Niveau de Source)
Une fois dans le menu des paramètres audio, sélectionnez la ligne « Régulateur Automatique de Niveau Sonore ». Une petite fenêtre contextuelle apparaîtra, vous permettant de choisir l’une des cinq options selon vos besoins.
Le Régulateur Automatique de Niveau Sonore est une fonction disponible sur certains récepteurs AV Pioneer intégrés qui permet d’ajuster automatiquement le volume principal du système sonore en fonction de la vitesse de la voiture. Plus la vitesse est élevée, plus le volume sera fort ; lorsque vous ralentissez, le volume de l’appareil diminue en conséquence. Cette fonction est très utile pour compenser le bruit ambiant et routier sans que vous ayez à interagir constamment avec le récepteur, vous permettant ainsi de rester concentré sur la route. Comme chaque véhicule a une construction différente et donc des niveaux de bruit routier différents, nous avons prévu quatre niveaux de compensation acoustique.
Une fois ce réglage effectué, vous pouvez revenir au menu des paramètres audio et sélectionner la ligne « Régleur de Niveau de Source ».
Le Régleur de Niveau de Source vous permet d’égaliser différents sources audio afin qu’elles aient une intensité similaire lorsque vous passez d’une source audio à une autre. Comme ce réglage nécessite une référence, nous avons choisi le tuner FM comme point de base. Vous comprendrez donc pourquoi ce menu n’est pas disponible si le tuner FM est sélectionné et actif. Ainsi, si une source joue plus fort ou plus doucement qu’une autre, ce menu sera très utile.

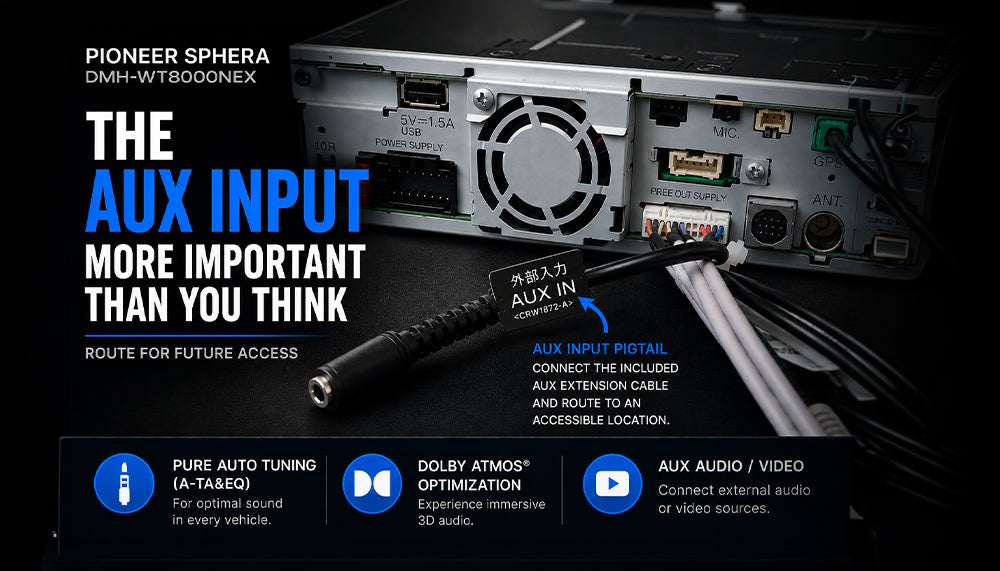
Quelque chose manque-t-il ? (Pioneer Sound Retriever)
Sound Retriever de Pioneer Cette fonction est conçue pour compenser le manque de dynamique et les informations audio manquantes ou altérées qui affectent la qualité sonore des fichiers audio compressés, comme les MP3. Cette fonction exclusive à Pioneer restaure partiellement les détails, la vivacité et la clarté perdue lors du processus de compression des données. Le Sound Retriever de Pioneer améliore la qualité sonore des fichiers audio compressés, les rapprochant d’une expérience musicale typique de type CD.
Comment ça fonctionne
- Analyse le fichier audio compressé et identifie les fréquences généralement écrasées ou supprimées lors de la compression.
- Réintroduit les fréquences manquantes et leur amplitude en se basant sur les harmoniques audio absentes grâce à un algorithme complexe d’analyse et de comparaison.
- Le résultat acoustique final offre un son plus riche et plus vibrant, particulièrement perceptible avec les MP3 et autres formats audio compressés, comme le streaming.

Quels sont les avantages ?
-
Qualité sonore améliorée
- Plus de vivacité acoustique, plus de détails et plus de dynamique dans votre expérience d’écoute.
-
Expérience d’écoute améliorée
- En restaurant les fréquences perdues, le Sound Retriever rend la musique plus agréable, plus naturelle et plus vivante.
-
Polyvalence des sources
- Compatible avec diverses sources audio, y compris les CD, clés USB, appareils audio Bluetooth, smartphones, et bien sûr, votre source de streaming préférée !
Comment l'utiliser ?
Une fois dans le menu des réglages audio, sélectionnez la ligne « Sound Retriever ».
Pioneer Sound Retriever offre deux niveaux (Niveau 1, Niveau 2, ou Désactivé) pour permettre aux utilisateurs de sélectionner le réglage optimal selon leurs préférences musicales et la source audio utilisée.
Vous pouvez valider la meilleure option pour votre expérience d’écoute par une simple touche sur l’écran. Le niveau 1 sera normalement utilisé pour des niveaux de compression plus faibles, tandis que le niveau 2 est généralement utilisé pour des niveaux de compression plus élevés de la source.

Où êtes-vous ? (Position d’Écoute / Alignement Temporel)
Une fois dans le menu des réglages audio, sélectionnez la ligne « Position d’Écoute ».
La Position d’Écoute vous permet, une fois activée et votre alignement temporel calibré, d’obtenir une meilleure image sonore (scène audio) optimisée pour votre environnement et votre position d’écoute. Puisque l’habitacle de votre voiture présente un certain défi pour l’intégration des haut-parleurs et votre position d’écoute devant eux, il est essentiel d’ajuster les délais de propagation sonore de vos haut-parleurs afin que vos oreilles reçoivent ces différentes informations en même temps, même si ces haut-parleurs ne sont pas nécessairement à la même distance de la position d’écoute. En ayant un timing parfait pour recevoir les sons provenant des différents haut-parleurs de la voiture, cela vous permettra d’obtenir une synchronisation optimisée et, par conséquent, d’offrir une image sonore plus précise avec vos instruments et voix là où ils doivent être positionnés. Cela vous permettra également de bénéficier de toute la réverbération sonore de l’enregistrement et non d’un son acoustique biaisé par ces problèmes de timing. Bien sûr, cela permettra aussi à votre système audio de générer une attaque des basses harmonieuse et précise au lieu d’être floue.
Une fois la calibration temporelle terminée, il vous sera facile de sélectionner la correction que vous souhaitez appliquer en fonction des personnes dans la voiture en sélectionnant le(s) siège(s) désiré(s) ;
- conducteur uniquement,
- passager avant uniquement,
- sièges avant,
- ou tous les sièges du véhicule.
Une fois que le siège du conducteur est sélectionné comme point de départ, vous pouvez maintenant revenir au menu des réglages audio et sélectionner la ligne « Alignement temporel ». Vous serez alors dirigé vers l'écran d'alignement temporel avec le siège avant gauche mis en surbrillance. Nous avons pris soin d'offrir une calibration dans sa forme la plus simple, vous n'avez donc pas besoin d'un diplôme en acoustique pour accomplir la tâche. Aucun calcul complexe n'est requis ; un simple mètre ruban suffit.
Pour réaliser cet exercice, mesurez simplement la distance entre le centre de la tête du conducteur et le point central de l'enceinte (idéalement le dôme ou le cache-poussière de l'enceinte), puis saisissez la distance mesurée dans le récepteur Pioneer en utilisant les curseurs situés de chaque côté de l'unité de mesure. Une fois que vous avez entré les informations pour les enceintes avant, les enceintes arrière et le caisson de basses, quittez simplement la page en utilisant la flèche de retour située en haut à gauche de l'écran.
Si vous avez plus d'une enceinte alimentée par la même sortie audio, par exemple un ensemble composant médium et tweeter, nous recommandons d'entrer la moyenne des deux distances mesurées dans le récepteur.

Avez-vous une courbe douce ? (Réglages EQ)
Abordons maintenant un sujet qui est souvent source de disputes et d'opinions divergentes : l'égalisation acoustique. À mon avis, la meilleure façon de résumer le sujet serait de vous dire que l'égalisation acoustique, tout comme le son des enceintes perçu par nos oreilles une fois impacté par la coloration de l'environnement d'écoute, est un peu comme une glace. Oui, vous avez bien lu, comme une glace ! L'important est de s'assurer que la glace est bien une glace et non autre chose. Quant à la saveur, chacun aura sa propre préférence. Pour le résultat final dans vos oreilles, c'est la même chose ; certains préféreront plus de basses, d'autres une voix plus dominante, etc. Pour cela, c'est subjectif, et il est donc important d'ajuster tout cela pour répondre aux préférences d'écoute DE L'UTILISATEUR et non à celles de l'installateur ! Cependant, lisser la courbe est une toute autre affaire. Car, que vous aimiez la glace au chocolat ou à la vanille, vos oreilles et votre cerveau n'apprécieront jamais d'être confrontés à des écarts acoustiques tels que des « pics » et des « creux » anormaux, ou pire, d'avoir les deux extrêmes juxtaposés. Il est donc essentiel de lisser cette courbe (considérez cela comme la composition de base et la texture de votre glace) pour obtenir une acoustique naturelle qui sera harmonieuse pour vos oreilles.
Sans entrer dans un long cours pour un diplôme en acoustique, mais en vous donnant quand même les bases pour régler votre système audio, vous devez toujours garder à l'esprit les points clés suivants :
-
Le signal électrique n’est pas égal à votre perception acoustique.
- La courbe affichée à l’écran de votre récepteur AV Pioneer intégré n’est PAS la courbe acoustique que vos oreilles percevront. Une possible « coloration » due à l’amplification, au design de vos enceintes, et bien sûr, à divers éléments de l’environnement d’écoute, tels que le positionnement, les angles, les matériaux et les courbes des garnitures intérieures, sur lesquels le son va rebondir, auront tous un impact sur le résultat final perçu par vos oreilles.
-
Avant de rectifier une courbe d’égalisation, il est essentiel d’ajuster les filtres de votre système.
- Les fréquences des filtres de vos enceintes et la pente à laquelle ces croisements sont appliqués auront un impact important sur les résultats. (Voir la section « Crossover » ci-dessous pour plus de détails.)
-
Avant de rectifier une courbe d’égalisation, il est essentiel d’ajuster l’alignement temporel de votre système.
- Si une fréquence commune à plusieurs enceintes est transmise, sa poussée acoustique sera plus importante si elle est reçue en même temps. Par conséquent, si votre alignement temporel n’est pas correct en fonction de votre position d’écoute ou des mesures prises, votre correction d’égalisation ne sera pas optimale.
-
Pour rectifier correctement une courbe d’égalisation, vous devez disposer du même type de contenu musical qui sera utilisé quotidiennement par la suite.
- Comme nous l’avons mentionné plus tôt dans cet article, il est ESSENTIEL d’avoir la même qualité d’enregistrement et le même type de fichier pour votre calibration que le contenu qui sera utilisé pour l’écoute musicale quotidienne. À titre d’exemple basique, si vous effectuez des corrections sur une source non compressée, et que l’utilisateur écoute principalement de la musique compressée, une perte significative des hautes fréquences sera perçue.
-
En fin de compte, vous aurez également besoin de certains outils de mesure acoustique.
- Idéalement, un bon microphone calibré conçu à cet effet, ainsi qu'un dispositif de calibration acoustique, ou un ordinateur/tablette avec le logiciel approprié, sont nécessaires pour effectuer des mesures et corrections plus précises. Parfois, même une « bonne oreille » peut manquer des points importants. Comme solution alternative, vous pouvez facilement trouver de petites applications de mesure acoustique (RTA – analyseur en temps réel), disponibles sur l’Apple App Store ou le Google Play Store, que vous pouvez utiliser avec un smartphone ou une tablette pour réaliser l’exercice à moindre coût. Pour utiliser ces outils de calibration, vous devrez également télécharger, dans le même format de fichier que la musique de l’utilisateur (MP3, WAV, FLAC, etc.), une source audio appelée « BRUIT ROSE » corrélé, qui est un enregistrement de toute la bande passante audio avec un signal électrique complètement uniforme (plat), de 20 Hz à 20 kHz, parfaitement synchronisé pour les canaux gauche et droit.
Une fois que vous avez les connaissances et les outils en main, il est temps de revoir l'égalisation acoustique de votre système. Pour cet exercice, si vous le faites à l'oreille, choisissez une musique que vous connaissez et aimez, afin d'avoir une référence claire pour ajuster l'égalisation.
Pour de meilleurs résultats de calibration, en utilisant un équipement de mesure et une source audio de « BRUIT ROSE », placez votre microphone à la position d'écoute dans la voiture, représentant le centre de votre tête. Un trépied pour appareil photo est idéal pour positionner et vous permettre d'avoir les mains libres pour mieux interagir dans le processus. Lancez le fichier de BRUIT ROSE en boucle, puis ajustez le volume de la source principale à votre volume d'écoute quotidien normal.
Le premier objectif de l'exercice est de réduire les pics et creux acoustiques. Puis, rectifiez généralement la courbe d'égalisation pour obtenir un résultat acoustique qui reflète fidèlement les attentes d'écoute. L'objectif n'est pas d'avoir une mesure avec l'analyseur en temps réel « PLAT » (voir l'image centrale ci-dessous à titre illustratif), car votre appréciation de la musique dans ces conditions sera probablement... PLATE ! La plupart des gens préfèrent plus de basses et une courbe montrant des sorties plus faibles dans les hautes fréquences. Je me répète, mais cela reste totalement indicatif et peut varier d'une personne à l'autre. Cependant, comme les résultats l'ont prouvé, cette « courbe acoustique cible » (voir image ci-dessous à droite à titre illustratif) est un excellent point de départ qui plaira à la plupart des gens.
Pour ajuster l'égalisation de votre récepteur AV Pioneer intégré, vous devez accéder au menu Paramètres audio. Une fois dans ce menu, sélectionnez la ligne « EQ ». Vous serez alors dirigé vers la page « EQ », qui vous permettra de choisir l'égalisation audio qui correspond le mieux à vos objectifs. Pour des réglages optimaux et personnalisés, la plupart de nos récepteurs AV intégrés disposent de deux préréglages : « Personnalisé 1 » et « Personnalisé 2 », utilisables selon différents besoins, par exemple une calibration avec les fenêtres du véhicule fermées et une autre avec les fenêtres ouvertes.
Conseils supplémentaires pour l'égalisation
Pour chaque ajustement de +3dB/-3dB sur un appareil, vous doublez ou divisez par deux l'amplitude du signal, ce qui met donc deux fois plus ou deux fois moins de puissance sur vos enceintes. Par conséquent, si vous réglez une bande d'égalisation à +6 (+6dB), cela demandera quatre fois plus d'effort à vos enceintes pour cette fréquence donnée. Soyez donc prudent avec vos réglages ; il vaut toujours mieux corriger légèrement à la baisse d'autres fréquences que de surcorriger positivement à un seul point.

Envoyez-vous la bonne information au bon endroit ? (Paramètres du caisson de basses et du filtre crossover)
Les filtres actifs (Réglages du crossover) intégrés dans votre récepteur embarqué Pioneer sont d'excellents outils pour extraire un meilleur son de vos haut-parleurs. Ils aident également à protéger votre investissement en empêchant de diriger une source audio que certains haut-parleurs pourraient ne pas être capables de reproduire correctement. Selon leurs différentes tailles et conceptions, les haut-parleurs n'ont pas tous les mêmes capacités physiques, thermiques ou acoustiques pour gérer ces fréquences. Par exemple, diffuser un signal audio large bande à travers un petit haut-parleur de 4 pouces n'est pas seulement illogique, cela entraînera certainement des dommages au haut-parleur si vous avez tendance à écouter votre musique à volume élevé... et encore plus si vous utilisez des amplificateurs externes puissants ou des corrections positives dans les basses fréquences, comme un boost des basses !
Vous pouvez facilement sélectionner les réglages de crossover appropriés en fonction de votre système audio en utilisant une référence simple : la réponse en fréquence de vos haut-parleurs. Puisque l'aspect critique d'un haut-parleur est sa capacité à reproduire correctement les basses fréquences plus que les hautes fréquences, nous recommandons de concentrer vos réglages principaux sur cet aspect.
Réglage de votre crossover ;
-
Sélectionnez la fréquence de coupure entre vos caissons de basses et vos haut-parleurs avant/arrière, ou le "Mid" si vous êtes en mode "Réseau".
- Lorsque vous êtes dans une configuration qui intègre des caissons de basses et des amplificateurs externes, La règle de base pour déterminer cette fréquence est de prendre la fréquence la plus basse affichée dans la bande passante du haut-parleur et de la multiplier par deux. Une fois cette valeur confirmée, il suffit d'ajuster votre filtre passe-haut pour vos haut-parleurs avant/arrière (ou "Mid" si vous êtes en mode Réseau) avec la fréquence disponible la plus proche parmi les options de crossover.
-
-
- Avec un Pioneer TS-A1681F de 6,5 pouces, par exemple, un haut-parleur avec une réponse en fréquence de 35 Hz à 29 kHz, vous devriez régler le filtre passe-haut à 70 Hz. Pourquoi choisir cette fréquence, qui est le double de la fréquence la plus basse indiquée dans les spécifications ? Simplement parce que cette fréquence n'est pas le point de coupure naturel du haut-parleur, mais une octave plus basse, d'où la nécessité de multiplier cette information par deux. Ainsi, en effectuant ce réglage, vous alignez le point de coupure de la source audio avec le point de coupure naturel du haut-parleur. (Vous ne demandez pas plus, mais vous ne perdez rien non plus.)
-
-
- Lorsque vous êtes dans une configuration sans caissons de basses, utilisant uniquement des haut-parleurs "large bande", et ces haut-parleurs utilisent la puissance interne de votre récepteur embarqué, vous pouvez ajuster le filtre passe-haut à une fréquence plus basse ou même désactiver le filtre pour compenser l'absence de caisson de basses. Cependant, il est important de comprendre que cette "pression" supplémentaire sur le haut-parleur affectera ses performances et réduira considérablement sa capacité de gestion de la puissance. Par conséquent, si vous constatez une baisse de la qualité sonore ou des voix médiocres, c'est peut-être parce que vous demandez trop à ces haut-parleurs, et il serait judicieux d'ajouter un caisson de basses spécialement conçu à cet effet.
- Si vous êtes en mode "Réseau", effectuez le même exercice que pour le filtre passe-haut sur votre “Médium” et appliquez le filtre passe-haut requis pour vos tweeters. Si c’est votre cas, NE JAMAIS, JAMAIS augmenter le volume de votre système audio avant d’avoir correctement réglé ces paramètres de filtre passe-croisé. Ne pas le faire entraînera essentiellement la destruction de vos tweeters.
-
Une fois que vous avez éliminé les basses indésirables pour les haut-parleurs ciblés, vous pouvez vous concentrer sur les filtres passe-bas, qui refléteront normalement les filtres que vous venez d’appliquer pour les basses fréquences. Par conséquent, activez un filtre passe-bas pour votre “Médium” si vous êtes en mode "Réseau", ainsi que le filtre passe-bas pour vos caissons de basses.
-
- Reprenant notre exemple précédent, si vous avez un filtre passe-haut pour votre TS-A1681F à 70Hz, il sera alors logique d’avoir un filtre passe-bas à 70Hz pour vos caissons de basses.
-
-
Enfin et surtout, vous devez ajuster la pente de vos filtres respectifs pour couper ces fréquences indésirables plus ou moins rapidement. Un bon point de départ est d’appliquer des filtres à -12dB/Oct. sur vos haut-parleurs médiums et aigus, et d’appliquer une pente de -18dB/Oct. sur le filtre passe-bas de vos caissons de basses.
-
Pourquoi ne pas appliquer une pente plus raide ? Il y a deux raisons principales :
- Plus la pente est raide, plus la transition sera nette. Donc, si, par exemple, nous avons une coupure trop marquée entre les tweeters et les haut-parleurs médiums d’un ensemble de composants, cela augmentera la démarcation acoustique entre ces deux éléments.
- Le résultat: vous pourrez clairement identifier la transition audio entre les deux haut-parleurs au lieu d’avoir la perception que tout le son provient de l’ensemble des composants.
- Selon la pente utilisée, un filtre passe-croisé génère également un signal audio qui n’est pas en phase avec la source. Pour chaque étape de -6dB/oct., la sortie audio d’un filtre affiche un décalage de phase de 90 degrés dans le signal. Ainsi, un filtre passe-bas à -12dB/oct. (180 degrés) sur un haut-parleur médium, juxtaposé à un filtre passe-haut à -12dB/oct. (180 degrés) sur un tweeter, permettra à ces deux unités d’être parfaitement en phase l’une avec l’autre.
-
Alors pourquoi -18dB/oct. sur les caissons de basses comme point de départ ?
- Pour couper plus rapidement les hautes fréquences, préservant ainsi toute la bande passante pour les caissons sans trop remonter dans les basses médiums et médiums du spectre audio. Croyez-moi, vous ne voulez vraiment pas entendre de voix dans un caisson de basses.
- Parce que nous devons remettre les basses fréquences des caissons de basses en phase avec les signaux provenant des autres haut-parleurs. Selon l'acoustique de la voiture, la conception de votre caisson de basses, son emplacement et sa manière d'installation, il peut ajouter des décalages de phase au signal audio provenant de votre caisson. Comment valider cela ? Écoutez une source audio avec de bonnes basses et essayez les différents réglages de pente disponibles pour vos caissons. Lorsque cette pente et cette phase sont les plus appropriées, vous percevrez un meilleur impact et des basses plus nettes grâce à une meilleure cohésion entre les sources (haut-parleurs). De plus, des caissons en phase offriront une meilleure spatialisation audio.
-
Pourquoi ne pas appliquer une pente plus raide ? Il y a deux raisons principales :

Un peu d'épices peut être bon, mais trop, c'est toujours mauvais ! (Bass Boost)
Les récepteurs AV Pioneer intégrés offrent un "Bass Boost" qui augmente la partie basse fréquence de votre audio à différents niveaux possibles (cinq + Off), un peu comme votre égaliseur, mais en agissant simultanément sur plusieurs bandes de fréquences et progressivement vers la fréquence principale (Low Q). Cela vous permet de compenser rapidement le type de source que vous écoutez si elle manque de basses, tout en laissant intacte la correction acoustique de votre égaliseur.
Ce réglage peut être très utile si vous écoutez momentanément un type de musique manquant de basses, puis revenez à une autre source. Cependant, comme nous l'avons mentionné à propos du réglage "Loudness", nous vous encourageons à l'utiliser avec précaution, surtout qu'il fournit une correction constante quel que soit le volume d'écoute, tandis que le "loudness" diminue à des volumes plus élevés.

ASTUCES SUPPLÉMENTAIRES POUR VOUS ÉVITER DES MAUX DE TÊTE (Sauvegardez vos réglages)
Après tout ce travail, ce serait dommage de tout perdre accidentellement ! Nous avons donc pris soin d'ajouter une mémoire non volatile à nos appareils pour vous permettre de sauvegarder vos réglages audio. Cela sera très utile si vous déconnectez la batterie de votre véhicule ou si vous effectuez une mise à jour du firmware de l'appareil.

Restez à l'écoute pour notre prochain article, où nous aborderons un aspect très intéressant d'un système audio : l'amplification. Comme nous le savons tous, un amplificateur audio vous permet d'écouter un son plus puissant. Mais saviez-vous que le but principal d'un amplificateur n'est pas nécessairement de rendre votre musique plus forte, mais d'ajouter plus de dynamisme, d'apporter plus de détails à votre expérience et de donner vie à votre musique ?

